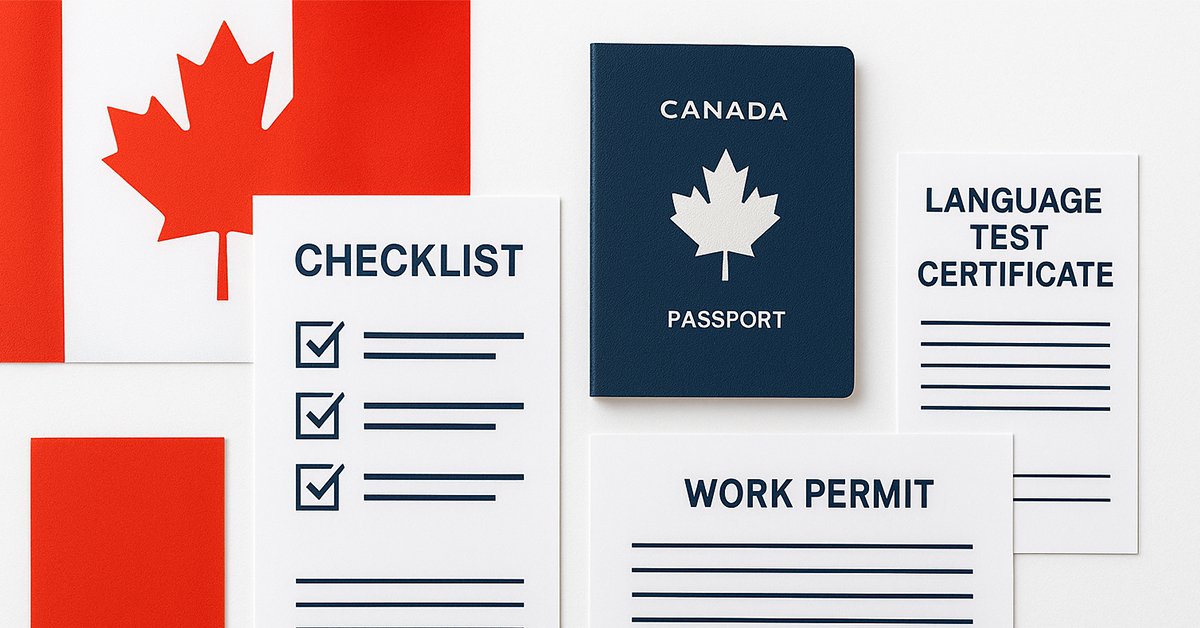

Introduction: Why Document Preparation is Critical
Canada’s new temporary resident to permanent resident (TR to PR) pathway represents a golden opportunity for 33,000 temporary residents to secure Canadian permanent residence in 2026 and 2027. However, history shows that preparation is everything.
When the original TR to PR pathway launched in 2021, it reached capacity on the same day applications opened. Thousands of eligible temporary residents missed their opportunity simply because they didn’t have essential documents ready—particularly language test results and police certificates.
This comprehensive guide ensures you won’t make the same mistake. We’ll walk you through every document you need to prepare now, so you can submit your application immediately when the pathway opens.
Understanding Canada’s New TR to PR Pathway
What is the TR to PR Pathway?
The TR to PR pathway is a special immigration initiative announced in Canada’s latest Immigration Levels Plan. This one-time measure will help 33,000 temporary residents transition to permanent residence status during 2026 and 2027.
Why Early Preparation Matters
Three critical reasons to prepare documents now:
- Limited spots: With only 33,000 spaces available, applications may reach capacity within hours or days
- Processing delays: Documents like police certificates can take 2-6 months to obtain
- Validity requirements: Many documents have strict expiry dates and must be current when you apply
Starting your document preparation today could be the difference between securing permanent residence and missing the opportunity entirely.
Essential Documents: Complete Checklist for All Applicants
1. Language Proficiency Test Results
Why It’s Critical: Language testing provides objective proof that you meet minimum English or French requirements. Without valid test results from an approved provider, your application will be incomplete.
Approved Tests for Economic Immigration:
- CELPIP-General (English)
- IELTS General Training (English)
- PTE Core (English)
- TEF Canada (French)
- TCF Canada (French)
Important Requirements:
- Results must be less than 2 years old on your application date
- Must come from IRCC-approved test providers
- Electronic test results are acceptable if verified
Action Steps:
- Book your test 2-3 months in advance
- Allow 3-6 weeks for results processing
- Keep digital and physical copies in a secure location
- Set a calendar reminder 18 months after your test date to retake if needed
2. Police Certificates (Criminal Background Checks)
Processing Time: 2-6 months depending on country
Why Start Early: These documents take the longest to obtain and are mandatory for all applicants and family members aged 18+
Requirements:
- One certificate for every country where you lived 6+ consecutive months since age 18
- No certificate needed for time spent in Canada
- Excludes time before turning 18
Timing Rules:
- Current country of residence: Must be issued within 6 months of submitting your PR application
- Previous countries: Must be issued after your last stay of 6+ months
How to Obtain: Visit IRCC’s “How to get a police certificate” page and search for your specific country. Each jurisdiction has different requirements and may use different terminology (criminal record check, good conduct certificate, clearance certificate, etc.).
Pro Tip: Request certificates from previous countries now. For your current country, time it so you receive the certificate 1-2 months before the expected pathway opening.
3. Educational Credential Assessment (ECA)
Required For: Foreign degrees and diplomas
Validity: 5 years from issue date
Processing Time: 4-12 weeks depending on provider
Approved ECA Organizations:
- World Education Services (WES)
- International Credential Assessment Service of Canada (ICAS)
- Comparative Education Service (CES)
- International Qualifications Assessment Service (IQAS)
- Medical Council of Canada (for physicians)
- Pharmacy Examining Board of Canada (for pharmacists)
What an ECA Does: Assesses your foreign educational credentials and determines the equivalent Canadian education level (e.g., Bachelor’s degree, Master’s degree, diploma).
For Canadian Education: If you completed your degree or diploma in Canada, you don’t need an ECA. Simply provide:
- Official final transcripts
- Proof of graduation (degree/diploma certificate)
Action Steps:
- Gather all original transcripts and degree certificates
- Check if your institution requires special procedures for sending documents
- Choose an approved ECA provider and submit your application
- Follow up to ensure documents are received and being processed
4. Travel History Documentation
Required Period: Past 10 years (or since age 18, whichever is shorter)
IRCC Form: IMM 5562 – Supplementary Information: Your Travels
What to Include:
- Every trip outside your country of origin or residence
- Exact dates (entry and exit)
- Destination countries
- Purpose of travel
Supporting Documents:
- Detailed travel log with dates and destinations
- Passport stamps (all pages of current and expired passports)
- Airline booking confirmations
- Entry/exit records
How to Prepare: Create a spreadsheet with columns for: departure date, return date, destination country, purpose. Go through all your passports systematically and record every stamp. Cross-reference with emails, photos, and credit card statements if needed.
Why It Matters: Immigration officers cross-reference your travel history with police certificates and background declarations to verify consistency and identify any time spent in countries requiring additional documentation.
5. Employment History and Reference Letters
Critical for Eligibility: Most TR to PR streams require specific Canadian or foreign work experience
Complete Employment History Should Include:
- Every job since age 18 (or past 10 years minimum)
- Company name and location
- Job title and National Occupational Classification (NOC) code
- Employment dates (month and year)
- Number of hours worked per week
- Main duties and responsibilities
Employer Reference Letters Must Include:
- Your job title and position
- Employment dates (start and end, or ongoing)
- Number of hours worked per week
- Annual salary and benefits
- Detailed job duties and responsibilities
- Company letterhead with contact information
- Supervisor’s name, title, and signature
Supporting Documents:
- For Canadian employment: T4 slips, Notice of Assessment (NOA), pay stubs
- For all employment: Contracts, offer letters, promotion letters
- Self-employment: Incorporation documents, tax returns, client contracts
Pro Tip: Contact previous employers now, before they lose your employment records. Some companies purge employee files after a certain period.
6. Proof of Current Canadian Employment
Required When: The pathway requires current Canadian employment (expected for most streams)
Must Include:
- Valid work permit showing your authorized employer
- Current employer reference letter (same requirements as above)
- Recent pay stubs (last 3-6 months)
- Current employment contract
- Letter confirming ongoing employment status
Important: Your work permit must be valid when you apply, or you must have maintained status if you’ve applied for an extension.
7. Identity and Civil Status Documents
For Primary Applicant:
- Passport (all pages, including blank pages)
- Birth certificate
- Marriage certificate or proof of relationship
- Divorce or annulment papers (if applicable)
- Death certificate of former spouse (if applicable)
- Adoption papers (if applicable)
Passport Requirements:
- Must be valid for at least 6 months beyond your expected processing time
- Renew now if expiry is approaching
- Include all expired passports used during the last 10 years
Civil Status Documentation: You must declare all immediate family members, even if they won’t accompany you to Canada. This includes:
- Current spouse or common-law partner
- Dependent children
- Former spouses (with proof of divorce/annulment)
8. Document Translations
When Required: Any document not in English or French must be translated
Two Acceptable Methods:
Option 1: Certified Translation
- Completed by a member of a professional translation association
- Includes translator certification and professional seal
- Submit both the translation and original document
Option 2: Affidavit Translation
- Completed by any competent translator
- Must include a sworn affidavit stating:
- Translator’s competence in both languages
- That the translation is accurate and complete
- Submit translation, affidavit, and original document
Important Rules:
- Family members cannot translate your documents
- All three components must be included (translation + affidavit/certification + original)
- Ensure translator affidavits are properly notarized
9. Organizational Affiliations and Memberships
IRCC Form: Schedule A – Background/Declaration (IMM 5669)
Must Declare Lifetime History Of:
- Political organizations or parties
- Professional associations
- Student organizations
- Social clubs and groups
- Religious organizations
- Volunteer positions (even informal)
- Charitable donations or financial support
Why It’s Required: This comprehensive background check helps IRCC assess security and admissibility. Failing to declare affiliations can result in misrepresentation, even if unintentional.
How to Prepare: Create a document listing every organization you’ve been involved with, including:
- Organization name
- Type of organization
- Your role or position
- Dates of involvement
- Any financial contributions
Keep reference letters from volunteer organizations and receipts for donations.
Documents for In-Canada Applicants
Proof of Valid Immigration Status
Must Demonstrate:
- Current valid status in Canada (work permit, study permit, or visitor record)
- Entry record to Canada
- Maintained status if applicable
Required Documents:
- Copy of current valid temporary resident document
- Entry stamp in passport or electronic entry record (eTA)
- If status expired but you applied for extension before expiry: copy of extension application and proof IRCC received it
Maintained Status Explained: If you applied to extend your status before it expired, you can remain in Canada with the same conditions (including work authorization if you had a work permit) until IRCC makes a decision. This is called “maintained status” or “implied status.”
Proof of Maintained Status:
- Copy of original work permit showing expiry date
- Proof you submitted extension application before expiry
- IRCC acknowledgment of receipt (email or online account screenshot)
Additional Documents for Family Members
For Spouse or Common-Law Partner
Identity Documents:
- Passport (all pages)
- Birth certificate
- Marriage certificate (for spouses)
For Common-Law Partners:
- IMM 5409 – Statutory Declaration of Common-Law Union
- Proof of 12+ months continuous cohabitation:
- Joint lease or mortgage
- Joint bank account statements
- Joint utility bills
- Joint credit cards
- Mail addressed to both partners at same address
- Affidavits from friends/family
Travel History:
- Same requirements as principal applicant
- IMM 5562 form for partners aged 18+
Police Certificates:
- Required for all countries where they lived 6+ months since age 18
- Same timing requirements as principal applicant
For Dependent Children
Identity Documents:
- Passport (all pages)
- Birth certificate showing both parents
- Adoption papers (if applicable)
- Custody documents (if applicable)
Age 18+:
- Travel history (IMM 5562)
- Police certificates (same requirements as adults)
Important: You must declare all dependent children on your application, even if they won’t accompany you to Canada. Failing to declare family members can result in them being permanently barred from Canadian immigration.
Situation-Specific Documents
Letter of Explanation (LOE)
When to Include:
- Employment or education gaps
- Name discrepancies between documents
- Missing required documents despite best efforts
- Address history gaps
- Any unusual circumstances
What to Include:
- Clear heading identifying what you’re explaining
- Concise, factual explanation
- Supporting evidence where possible
- Professional, respectful tone
Example Situations:
- “I was unable to obtain a police certificate from [country] because [reason]. I have attached evidence of my attempts including [list documents].”
- “There is a gap in my employment history from [dates] because I was caring for a family member. Attached is a letter from [relative] confirming this.”
Proof of Common-Law Relationship
Legal Definition: Two people who have lived together in a conjugal relationship for at least 12 continuous months
Strong Evidence Includes:
- Joint ownership of residence
- Joint bank accounts with regular transactions
- Joint credit cards
- Joint investments or savings
- Joint utility accounts (electricity, gas, water, internet)
- Insurance policies naming each other as beneficiaries
- Government correspondence addressed to both at same address
- Letters from friends and family attesting to relationship
- Photos together throughout the relationship period
Provide Multiple Types: Don’t rely on just one type of evidence. IRCC wants to see various forms of proof spanning the entire 12-month period.
Name Change Certificates
Required When:
- Your current name differs from name on birth certificate
- Name change occurred after marriage (beyond just taking spouse’s surname)
- Legal name change for any reason
Acceptable Documents:
- Official name change certificate from government authority
- Marriage certificate (if name changed through marriage)
- Adoption papers (if name changed through adoption)
Apply to All Documents: Ensure your name is consistent across all documents, or provide name change certificates to link different names.
Document Preparation Best Practices
1. Organize and Label Systematically
File Naming Convention: DocumentType_LastName_FirstName_YYYY-MM-DD.pdf
Examples:
- → AI and Machine Learning in 2026: Transforming Business Through Intelligent Innovation
- → Canada Immigration Backlog Update 2026: What the Latest IRCC Data Really Means
- → Mass Flight Disruptions Across Asia: 2,186 Delays and 134 Cancellations Hit Major Airports in India, Japan, Thailand, Malaysia, UAE, Singapore, and Qatar
- → $800 CRA Payment in March 2026: Which Canadian Families Qualify and When to Expect Their Direct Deposit
- → $533 GST/HST Credit for March 2026: Payment Dates, Eligibility, and Everything Canadians Need to Know
- → Canada Medical Expense Tax Claims 2026: Everything You Need to Know Before Filing
- → Canada Pension Plan (CPP) and Old Age Security (OAS): 2026 Payment Updates Every Canadian Retiree Should Know
PoliceCertificate_Smith_John_2025-11-15.pdfEmploymentLetter_Smith_John_CompanyABC_2025-12-01.pdfLanguageTest_Smith_John_IELTS_2024-03-20.pdf
Create Folder Structure:
TR-to-PR-Application/
├── Language-Tests/
├── Police-Certificates/
├── Education/
├── Employment/
├── Identity-Documents/
├── Family-Documents/
├── Translations/
└── Supporting-Evidence/
2. Scan Quality Standards
Technical Requirements:
- PDF format preferred
- Color scans for passports and official documents
- 300 DPI minimum resolution
- File size under 4MB per document
- All pages clear and fully visible
- No shadows, glare, or cropped edges
Scanning Tips:
- Use a flatbed scanner rather than mobile phone when possible
- Ensure entire document fits in frame
- Remove any background items
- Check that all text is legible before saving
3. Track Document Validity Dates
Create a spreadsheet with these columns:
- Document type
- Issue date
- Expiry date
- Valid for application (Yes/No)
- Renewal date needed
- Status (Pending/Ready/Expired)
Set Calendar Reminders For:
- Language test expiry (18 months after test date)
- ECA expiry (4.5 years after issue)
- Passport expiry (6 months before)
- Police certificate timing (for current country)
4. Verify Employer Letter Content
Employer letters must include specific IRCC requirements:
✅ Required Elements:
- Company letterhead
- Your full legal name
- Job title
- Employment dates (start to present/end)
- Full-time or part-time status
- Hours per week
- Annual salary and benefits
- List of main duties and responsibilities (detailed, specific to your role)
- Supervisor name, title, and signature
- Company contact information
- Date letter was written
❌ Common Mistakes to Avoid:
- Generic job descriptions copied from NOC
- Missing hours per week
- No supervisor signature
- Vague or brief duty descriptions
- Missing company contact information
Pro Tip: Provide your employer with a template that includes all required elements. This ensures nothing is forgotten and saves time.
5. Translation Requirements Checklist
For each non-English/French document:
☐ Professional translation completed
☐ Translator affidavit included (if not certified translator)
☐ Affidavit properly notarized
☐ Original document included
☐ All three components properly labeled
☐ Translator contact information included
6. Review Before the Pathway Opens
Two Weeks Before Expected Opening:
☐ Verify all documents are current and within validity periods
☐ Check language test hasn’t expired
☐ Confirm police certificate from current country is within 6-month window
☐ Review passport expiry date
☐ Ensure all scans are clear and complete
☐ Verify all passport pages are included (including blank pages)
☐ Double-check file naming is consistent
☐ Test opening each PDF to ensure files aren’t corrupted
☐ Create backup copies on multiple devices
☐ Review employment letters for completeness
☐ Confirm all family members are documented
Timeline for Document Preparation
6+ Months Before Opening
- Book and complete language tests
- Request police certificates from foreign countries where you no longer reside
- Submit ECA applications for foreign degrees
- Contact previous employers for reference letters
- Gather and organize identity documents
3-4 Months Before Opening
- Receive and file language test results
- Follow up on ECA processing
- Collect police certificates as they arrive
- Compile complete employment history
- Create detailed travel history log
2-3 Months Before Opening
- Request police certificate from current country of residence (timing critical)
- Obtain current employer reference letter and recent pay stubs
- Get all necessary translations completed and notarized
- Scan and label all documents
- Organize into digital folders
1 Month Before Opening
- Final review of all documents
- Verify expiry dates
- Ensure police certificate from current country is ready
- Create backup copies
- Prepare payment method for application fees
When Pathway Opens
- Submit application immediately
- All documents ready to upload
- Payment information ready
- Application completed accurately and thoroughly
Common Mistakes That Can Cost You PR
1. Expired Language Tests
The Problem: Language test results are only valid for 2 years. If your test expires before you submit your application, it’s as if you never took it.
The Solution: Track your test date carefully. If there’s any chance your test might expire before the pathway opens, retake it now.
2. Missing Police Certificates
The Problem: You need certificates from EVERY country where you lived 6+ months, even decades ago. Many applicants forget short stays or student exchanges.
The Solution: Review your travel history carefully. Check your passport stamps systematically. When in doubt, get the certificate.
3. Incomplete Employer Letters
The Problem: Generic letters that don’t include required information (hours per week, detailed duties, supervisor signature) are rejected.
The Solution: Provide your employer with a complete template. Review the letter carefully before accepting it.
4. Incorrect Document Timing
The Problem: Police certificates from your current country must be issued within 6 months of application. Getting them too early means they’ll be invalid; too late means you miss the window.
The Solution: Time this certificate carefully based on estimated pathway opening dates announced by IRCC.
5. Forgetting Family Members
The Problem: You must declare ALL immediate family members, even those not coming to Canada. Failing to declare them can result in them being permanently barred from Canadian immigration.
The Solution: Declare your spouse/partner and all dependent children, with complete documentation for each.
6. Poor Quality Scans
The Problem: Blurry, partial, or low-resolution scans may be rejected, requiring you to resubmit and potentially missing deadlines.
The Solution: Use a quality scanner, check each scan for clarity, and ensure all pages are included.
7. Inconsistent Information
The Problem: Dates, names, or details that don’t match across documents raise red flags and can delay processing or result in refusal.
The Solution: Cross-reference all documents. Use Letters of Explanation to address any legitimate discrepancies.
Next Steps: Stay Informed and Ready
Monitor IRCC Announcements
Official Sources:
- IRCC website
- Immigration, Refugees and Citizenship Canada news releases
- Your IRCC online account
- IRCC social media channels
Join Online Communities
Connect with others preparing for the TR to PR pathway:
- Reddit r/ImmigrationCanada
- Facebook groups for Canadian immigration
- Immigration forums and discussion boards
Benefits:
- Real-time updates when pathway opens
- Shared experiences and tips
- Document review assistance
- Moral support during the process
Consider Professional Help
When to Consult an Immigration Professional:
- Complex employment history
- Previous refusals or inadmissibility issues
- Complicated family situations
- Missing or difficult-to-obtain documents
- Limited time to prepare
Types of Professionals:
- Regulated Canadian Immigration Consultants (RCICs)
- Immigration lawyers
- Authorized representatives
Verify Credentials: Only work with authorized representatives listed on the ICCRC or provincial law society websites.
Conclusion: Preparation Equals Success
The 2021 TR to PR pathway filled in a single day, demonstrating that preparation is not optional—it’s essential. With only 33,000 spots available in the upcoming 2026-2027 pathway, being ready when applications open could be your only chance at Canadian permanent residence through this program.
By following this comprehensive checklist and preparing your documents now, you maximize your chances of success. Don’t wait for official announcement of the opening date—many documents take months to obtain, and by then it may be too late.
Your Action Plan:
- ✅ Start gathering documents today
- ✅ Book your language test immediately if you haven’t already
- ✅ Request police certificates from all applicable countries
- ✅ Contact employers for reference letters
- ✅ Create a document tracking system
- ✅ Set up reminders for validity dates
- ✅ Monitor IRCC for pathway announcements
The opportunity for Canadian permanent residence through the TR to PR pathway is within reach—but only if you’re prepared when the window opens. Start today, and you’ll be ready to submit your application the moment it becomes available.
